Okay, here’s that blog intro for furniture refinishing paint recommendations, written in English and designed to feel very human:Ever stare at that old dresser or tired-looking coffee table and just wish you could give it a new lease on life?
I’ve been there! Instead of tossing it and contributing to overflowing landfills, why not unleash your inner DIY enthusiast? A fresh coat of paint can work wonders, transforming dated furniture into a stylish statement piece that reflects your personal taste.
But with so many options out there, choosing the right furniture refinishing paint can feel overwhelming. Lately, I’ve noticed a surge in eco-friendly, low-VOC paints and mineral-based options, aligning with the growing trend of sustainable living.
Plus, advancements in paint technology are making DIY projects easier than ever, with self-leveling formulas and paints that require minimal prep work.
Let’s get the lowdown on choosing the perfect paint and techniques to elevate your furniture from drab to fab. Let’s nail down the specifics!
Alright, let’s dive into the nitty-gritty of breathing new life into your furniture with paint!
Understanding Paint Types: Choosing the Right One for Your Project

Choosing the correct paint is paramount; otherwise, all your hard work could be in vain. There are several types available, each with its strengths and weaknesses.
Let’s break down some popular options and what makes them suitable for different furniture projects. I once tried to use regular wall paint on a bedside table, thinking I’d save a few bucks.
Big mistake! It chipped within weeks. That experience taught me the importance of selecting a paint specifically formulated for furniture.
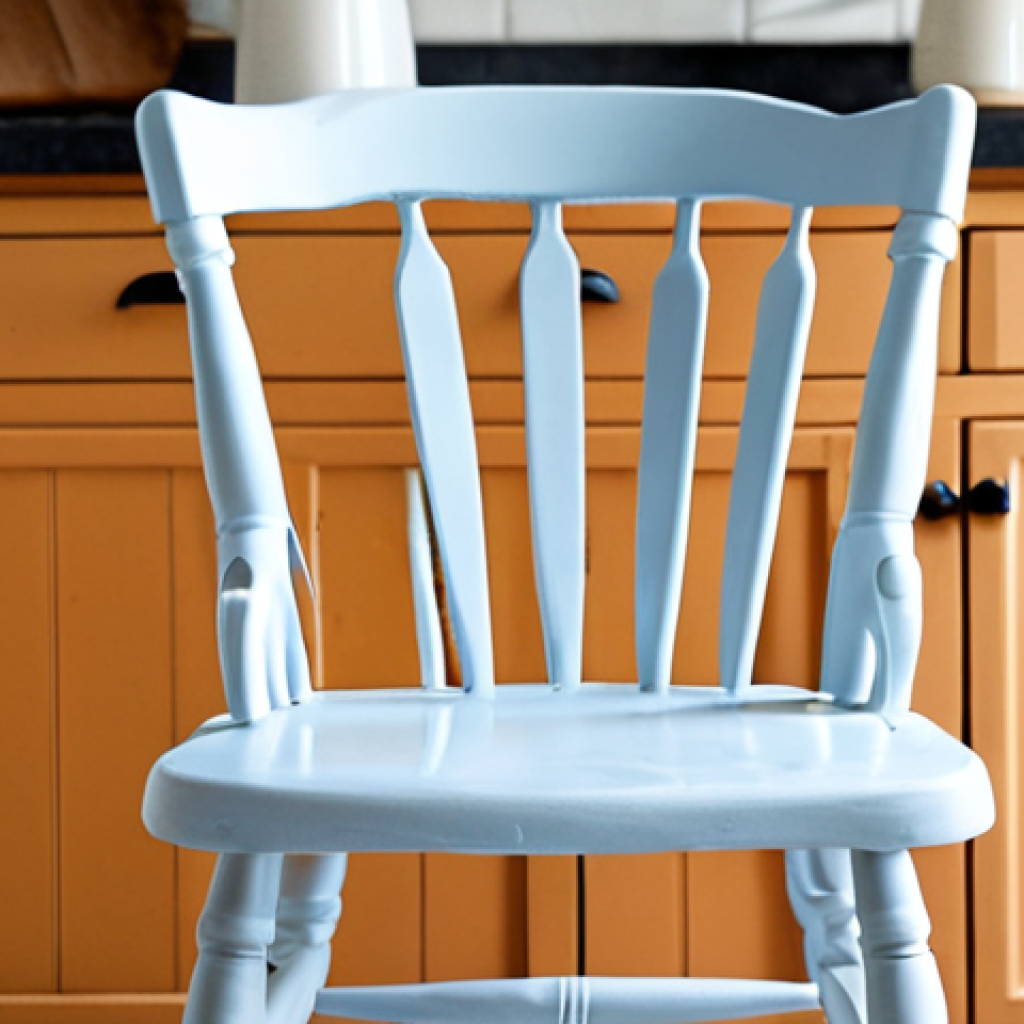
Latex Paint: A Versatile and User-Friendly Choice
Latex paint is a water-based option prized for its ease of use and low odor. It’s a great choice for beginners because it’s easy to clean up with soap and water.
Plus, it comes in a vast array of colors. However, it’s not as durable as some other options and may require a sealant for high-traffic pieces. I used latex paint to refinish an old farmhouse-style kitchen chair recently.
After a light sanding and a coat of primer, the latex paint went on smoothly, providing a beautiful, matte finish. I added a few coats of polycrylic sealant to protect it from everyday wear and tear.
Oil-Based Paint: Durable but Requires Extra Care
Oil-based paints are known for their durability and smooth, glossy finish. They’re a good choice for furniture that will see heavy use, like dining tables or desks.
But they have a strong odor, require mineral spirits for cleanup, and take longer to dry. Be sure to use them in a well-ventilated area. My grandfather always swore by oil-based paints for their resilience.
He refinished his antique roll-top desk with an oil-based enamel years ago, and it still looks fantastic. Just remember the fumes and the cleanup are a real commitment.
Chalk Paint: The Distressed Look Made Easy
Chalk paint has gained massive popularity for its matte finish and ability to adhere to surfaces without much prep work. It’s perfect if you’re aiming for a distressed or vintage look.
But it’s porous and requires a sealant or wax to protect it from damage. A friend of mine turned a drab console table into a chic, shabby-chic piece using chalk paint.
The slightly textured finish and the ease of distressing gave it a unique character you couldn’t get with other types of paint.
Prep Work is Key: Setting the Stage for a Flawless Finish
I can’t stress this enough: skipping the prep work is like building a house on a shaky foundation. The better you prepare your furniture, the smoother and more durable your paint job will be.
This involves cleaning, sanding, and priming – each playing a crucial role in the final outcome.
Cleaning: Removing Dirt and Grime
Before you even think about sanding, give your furniture a good cleaning. Use a mild detergent and water to remove any dirt, grease, or grime. For stubborn stains, try a degreasing cleaner.
I always scrub with an old toothbrush to get into those hard-to-reach corners and crevices.
Sanding: Creating a Smooth Surface
Sanding is essential for creating a smooth surface and helping the paint adhere properly. Use sandpaper with varying grits, starting with a coarser grit to remove any existing finish and then moving to a finer grit to smooth things out.
Remember to sand in the direction of the wood grain. I once rushed the sanding process on a vintage dresser and ended up with noticeable scratches under the new paint.
Now, I always take my time and pay attention to detail.
Priming: Ensuring Adhesion and a Uniform Finish
Primer is your best friend when it comes to creating a smooth, even base for your paint. It helps the paint adhere better, prevents bleed-through from stains, and ensures a uniform finish.
Choose a primer that’s compatible with the type of paint you’re using. I learned this the hard way when I tried to paint a dark wood cabinet with light paint.
Without primer, it took about four coats to cover the dark wood completely!
Essential Tools for Furniture Refinishing
Refinishing furniture requires a few essential tools. Having these on hand will make the process smoother and more efficient. From brushes and rollers to sandpaper and drop cloths, each tool plays a vital role in achieving a professional-looking finish.
Brushes and Rollers: Choosing the Right Applicator
The right brush or roller can make a huge difference in the final result. For smooth surfaces, use a high-quality brush with synthetic bristles or a foam roller.
For textured surfaces, a brush with natural bristles may be more effective. I always keep a variety of brushes and rollers on hand to tackle different parts of the furniture.
Sandpaper and Sanding Blocks: Smoothing Things Out
As mentioned earlier, sandpaper is crucial for prepping your furniture. Invest in a variety of grits, from coarse to fine, and consider using sanding blocks for easier handling and more even pressure.
I find that using a sanding block helps me avoid creating unwanted grooves or marks.
Drop Cloths and Painter’s Tape: Protecting Your Work Area
Don’t forget to protect your work area with drop cloths and painter’s tape. These will prevent paint splatters and drips from ruining your floors or other surfaces.
I always tape off any areas that I don’t want to paint, like hardware or trim.
Step-by-Step Painting Techniques for a Professional Finish
Now for the fun part: applying the paint! But before you start slathering it on, it’s important to understand the proper techniques for achieving a smooth, professional finish.
This includes applying thin coats, avoiding drips and runs, and allowing for proper drying time.
Applying Thin, Even Coats
The key to a smooth paint job is applying thin, even coats. Avoid the temptation to apply a thick coat of paint, as this can lead to drips, runs, and uneven drying.
Instead, apply several thin coats, allowing each coat to dry completely before applying the next.
Avoiding Drips and Runs
Drips and runs can ruin a perfectly good paint job. To avoid them, don’t overload your brush or roller with paint, and always paint in the direction of the wood grain.
If you do get a drip or run, use a brush to smooth it out immediately.
Allowing for Proper Drying Time
Patience is key when it comes to painting furniture. Allow each coat of paint to dry completely before applying the next. This will ensure a smooth, durable finish.
Check the paint can for the manufacturer’s recommended drying time.
Finishing Touches: Protecting and Enhancing Your Painted Furniture
Once your paint is dry, it’s time to add the finishing touches that will protect and enhance your painted furniture. This includes applying a sealant or wax, reattaching hardware, and buffing the finish.
Applying a Sealant or Wax
Sealants and waxes provide a protective layer that will help your painted furniture withstand everyday wear and tear. Sealants are more durable and easier to apply, while waxes provide a softer, more natural look.
I prefer using a polycrylic sealant for most of my projects because it’s water-based and easy to clean up.
Reattaching Hardware
Don’t forget to reattach any hardware that you removed before painting. This includes knobs, pulls, hinges, and other decorative elements. Clean the hardware before reattaching it to give your furniture a polished look.
Buffing the Finish
For a smooth, lustrous finish, buff your painted furniture with a soft cloth. This will remove any imperfections and enhance the color and shine of the paint.
I like to use a microfiber cloth for buffing because it’s gentle and won’t scratch the finish.
Dealing with Common Painting Problems
Even with careful preparation and technique, you might encounter some common painting problems. Knowing how to address these issues can save your project.
Brush Strokes
If you notice brush strokes in your final finish, it’s usually because the paint was too thick or you weren’t using the right brush. Lightly sand the area and apply a thinner coat of paint using a high-quality brush with synthetic bristles.
Uneven Coverage
Uneven coverage often stems from inadequate prep work or using the wrong type of primer. Ensure you’ve thoroughly sanded and primed the furniture before painting.
Applying multiple thin coats can also help achieve a more uniform finish.
Paint Chipping
Paint chipping is typically caused by poor adhesion. Make sure to clean and sand the furniture properly before painting, and use a primer to create a solid base for the paint to adhere to.
Applying a sealant can also provide added protection against chipping.
Cost Breakdown and Where to Buy Supplies
Let’s talk money! Knowing the costs involved and where to source your materials can make your refinishing project budget-friendly. I’ve learned a lot about saving money and finding the best deals.
Estimating Material Costs
The cost of materials will vary depending on the size of your project and the types of products you choose. Generally, you can expect to spend between $50 and $150 for a typical furniture refinishing project.
Here’s a rough breakdown:
| Item | Estimated Cost |
|---|---|
| Paint (quart) | $20 – $40 |
| Primer (quart) | $15 – $30 |
| Sandpaper | $5 – $10 |
| Brushes/Rollers | $10 – $20 |
| Sealant/Wax | $15 – $30 |
Finding Deals and Discounts
Look for sales and discounts at your local hardware store or online retailers. Signing up for email newsletters can also alert you to special promotions.
Additionally, consider buying supplies in bulk if you plan on tackling multiple projects.
Recommended Retailers
Here are a few retailers where you can find quality furniture refinishing supplies:* Home Depot
* Lowe’s
* Amazon
* Ace Hardware
* Specialty Paint StoresI’ve found that specialty paint stores often have knowledgeable staff who can provide personalized advice and recommendations.
Alright, let’s dive into the nitty-gritty of breathing new life into your furniture with paint!
Understanding Paint Types: Choosing the Right One for Your Project
Choosing the correct paint is paramount; otherwise, all your hard work could be in vain. There are several types available, each with its strengths and weaknesses. Let’s break down some popular options and what makes them suitable for different furniture projects. I once tried to use regular wall paint on a bedside table, thinking I’d save a few bucks. Big mistake! It chipped within weeks. That experience taught me the importance of selecting a paint specifically formulated for furniture.
Latex Paint: A Versatile and User-Friendly Choice
Latex paint is a water-based option prized for its ease of use and low odor. It’s a great choice for beginners because it’s easy to clean up with soap and water. Plus, it comes in a vast array of colors. However, it’s not as durable as some other options and may require a sealant for high-traffic pieces. I used latex paint to refinish an old farmhouse-style kitchen chair recently. After a light sanding and a coat of primer, the latex paint went on smoothly, providing a beautiful, matte finish. I added a few coats of polycrylic sealant to protect it from everyday wear and tear.
Oil-Based Paint: Durable but Requires Extra Care
Oil-based paints are known for their durability and smooth, glossy finish. They’re a good choice for furniture that will see heavy use, like dining tables or desks. But they have a strong odor, require mineral spirits for cleanup, and take longer to dry. Be sure to use them in a well-ventilated area. My grandfather always swore by oil-based paints for their resilience. He refinished his antique roll-top desk with an oil-based enamel years ago, and it still looks fantastic. Just remember the fumes and the cleanup are a real commitment.
Chalk Paint: The Distressed Look Made Easy
Chalk paint has gained massive popularity for its matte finish and ability to adhere to surfaces without much prep work. It’s perfect if you’re aiming for a distressed or vintage look. But it’s porous and requires a sealant or wax to protect it from damage. A friend of mine turned a drab console table into a chic, shabby-chic piece using chalk paint. The slightly textured finish and the ease of distressing gave it a unique character you couldn’t get with other types of paint.
Prep Work is Key: Setting the Stage for a Flawless Finish
I can’t stress this enough: skipping the prep work is like building a house on a shaky foundation. The better you prepare your furniture, the smoother and more durable your paint job will be. This involves cleaning, sanding, and priming – each playing a crucial role in the final outcome.
Cleaning: Removing Dirt and Grime
Before you even think about sanding, give your furniture a good cleaning. Use a mild detergent and water to remove any dirt, grease, or grime. For stubborn stains, try a degreasing cleaner. I always scrub with an old toothbrush to get into those hard-to-reach corners and crevices.
Sanding: Creating a Smooth Surface
Sanding is essential for creating a smooth surface and helping the paint adhere properly. Use sandpaper with varying grits, starting with a coarser grit to remove any existing finish and then moving to a finer grit to smooth things out. Remember to sand in the direction of the wood grain. I once rushed the sanding process on a vintage dresser and ended up with noticeable scratches under the new paint. Now, I always take my time and pay attention to detail.
Priming: Ensuring Adhesion and a Uniform Finish
Primer is your best friend when it comes to creating a smooth, even base for your paint. It helps the paint adhere better, prevents bleed-through from stains, and ensures a uniform finish. Choose a primer that’s compatible with the type of paint you’re using. I learned this the hard way when I tried to paint a dark wood cabinet with light paint. Without primer, it took about four coats to cover the dark wood completely!
Essential Tools for Furniture Refinishing
Refinishing furniture requires a few essential tools. Having these on hand will make the process smoother and more efficient. From brushes and rollers to sandpaper and drop cloths, each tool plays a vital role in achieving a professional-looking finish.
Brushes and Rollers: Choosing the Right Applicator
The right brush or roller can make a huge difference in the final result. For smooth surfaces, use a high-quality brush with synthetic bristles or a foam roller. For textured surfaces, a brush with natural bristles may be more effective. I always keep a variety of brushes and rollers on hand to tackle different parts of the furniture.
Sandpaper and Sanding Blocks: Smoothing Things Out
As mentioned earlier, sandpaper is crucial for prepping your furniture. Invest in a variety of grits, from coarse to fine, and consider using sanding blocks for easier handling and more even pressure. I find that using a sanding block helps me avoid creating unwanted grooves or marks.
Drop Cloths and Painter’s Tape: Protecting Your Work Area
Don’t forget to protect your work area with drop cloths and painter’s tape. These will prevent paint splatters and drips from ruining your floors or other surfaces. I always tape off any areas that I don’t want to paint, like hardware or trim.
Step-by-Step Painting Techniques for a Professional Finish
Now for the fun part: applying the paint! But before you start slathering it on, it’s important to understand the proper techniques for achieving a smooth, professional finish. This includes applying thin coats, avoiding drips and runs, and allowing for proper drying time.
Applying Thin, Even Coats
The key to a smooth paint job is applying thin, even coats. Avoid the temptation to apply a thick coat of paint, as this can lead to drips, runs, and uneven drying. Instead, apply several thin coats, allowing each coat to dry completely before applying the next.
Avoiding Drips and Runs
Drips and runs can ruin a perfectly good paint job. To avoid them, don’t overload your brush or roller with paint, and always paint in the direction of the wood grain. If you do get a drip or run, use a brush to smooth it out immediately.
Allowing for Proper Drying Time
Patience is key when it comes to painting furniture. Allow each coat of paint to dry completely before applying the next. This will ensure a smooth, durable finish. Check the paint can for the manufacturer’s recommended drying time.
Finishing Touches: Protecting and Enhancing Your Painted Furniture
Once your paint is dry, it’s time to add the finishing touches that will protect and enhance your painted furniture. This includes applying a sealant or wax, reattaching hardware, and buffing the finish.
Applying a Sealant or Wax
Sealants and waxes provide a protective layer that will help your painted furniture withstand everyday wear and tear. Sealants are more durable and easier to apply, while waxes provide a softer, more natural look. I prefer using a polycrylic sealant for most of my projects because it’s water-based and easy to clean up.
Reattaching Hardware
Don’t forget to reattach any hardware that you removed before painting. This includes knobs, pulls, hinges, and other decorative elements. Clean the hardware before reattaching it to give your furniture a polished look.
Buffing the Finish
For a smooth, lustrous finish, buff your painted furniture with a soft cloth. This will remove any imperfections and enhance the color and shine of the paint. I like to use a microfiber cloth for buffing because it’s gentle and won’t scratch the finish.
Dealing with Common Painting Problems
Even with careful preparation and technique, you might encounter some common painting problems. Knowing how to address these issues can save your project.
Brush Strokes
If you notice brush strokes in your final finish, it’s usually because the paint was too thick or you weren’t using the right brush. Lightly sand the area and apply a thinner coat of paint using a high-quality brush with synthetic bristles.
Uneven Coverage
Uneven coverage often stems from inadequate prep work or using the wrong type of primer. Ensure you’ve thoroughly sanded and primed the furniture before painting. Applying multiple thin coats can also help achieve a more uniform finish.
Paint Chipping
Paint chipping is typically caused by poor adhesion. Make sure to clean and sand the furniture properly before painting, and use a primer to create a solid base for the paint to adhere to. Applying a sealant can also provide added protection against chipping.
Cost Breakdown and Where to Buy Supplies
Let’s talk money! Knowing the costs involved and where to source your materials can make your refinishing project budget-friendly. I’ve learned a lot about saving money and finding the best deals.
Estimating Material Costs
The cost of materials will vary depending on the size of your project and the types of products you choose. Generally, you can expect to spend between $50 and $150 for a typical furniture refinishing project. Here’s a rough breakdown:
| Item | Estimated Cost |
|---|---|
| Paint (quart) | $20 – $40 |
| Primer (quart) | $15 – $30 |
| Sandpaper | $5 – $10 |
| Brushes/Rollers | $10 – $20 |
| Sealant/Wax | $15 – $30 |
Finding Deals and Discounts
Look for sales and discounts at your local hardware store or online retailers. Signing up for email newsletters can also alert you to special promotions. Additionally, consider buying supplies in bulk if you plan on tackling multiple projects.
Recommended Retailers
Here are a few retailers where you can find quality furniture refinishing supplies:
- Home Depot
- Lowe’s
- Amazon
- Ace Hardware
- Specialty Paint Stores
I’ve found that specialty paint stores often have knowledgeable staff who can provide personalized advice and recommendations.
Wrapping Up
And there you have it! Refinishing furniture with paint is a rewarding endeavor that can breathe new life into old pieces. With the right techniques and a little patience, you can achieve professional-looking results. Don’t be afraid to experiment and put your personal touch on each project. Happy painting!
Handy Tips and Tricks
1. Always test your paint color on a hidden area of the furniture before committing to the entire piece.
2. Use a tack cloth to remove any lingering dust particles after sanding and before painting.
3. When painting drawers, remove them completely and paint them separately for a cleaner finish.
4. Consider using stencils or painter’s tape to create unique designs on your furniture.
5. Don’t forget to let your creativity shine! Add personal touches like decorative knobs or unique color combinations.
Key Takeaways
Remember to prep your furniture well, choose the right paint for your project, and apply thin, even coats for the best results. Patience and attention to detail are your best friends when refinishing furniture. With a little practice, you’ll be transforming old pieces into stunning statement pieces in no time!
Frequently Asked Questions (FAQ) 📖
Q: What kind of prep work do I really need to do before painting?
A: Honestly, it depends on the furniture! If it’s super glossy or has a ton of scratches, a light sanding is a must. I learned that the hard way when my first attempt at refinishing a side table ended up with the paint peeling off in sheets a week later!
But if it’s already matte and in decent shape, a good cleaning with TSP or a similar degreaser should do the trick. Don’t skip cleaning – trust me, you don’t want to paint over years of accumulated grime.
Q: I’m seeing so many different types of furniture paint – chalk paint, milk paint, acrylic… Which one is best?
A: “Best” is subjective! Chalk paint is great for a rustic, distressed look, and it adheres really well to almost anything. But it needs a topcoat of wax or sealer to protect it.
Milk paint is super eco-friendly and gives a lovely, soft finish, but it can be a bit unpredictable. Acrylics are generally durable and easy to work with.
I tend to reach for acrylic latex paints for most projects because they’re readily available at my local Home Depot, easy to clean up, and offer a good balance of durability and ease of application.
It’s worth grabbing some samples and testing them out on a hidden spot to see what you like!
Q: How do I avoid brushstrokes when painting furniture?
A: Ah, the dreaded brushstrokes! I’ve been there, done that, got the t-shirt (covered in paint, of course!). My biggest tip is to use a good quality brush – synthetic brushes are great for latex paints – and apply the paint in thin, even coats.
Don’t overload your brush! And if you’re really aiming for a super smooth finish, consider using a paint sprayer. I invested in a basic Wagner sprayer a couple of years ago, and it’s been a game-changer, especially for larger pieces like dressers and cabinets.
Also, some paints are self-leveling, meaning they’ll smooth out any brushstrokes as they dry. Look for those!
📚 References
Wikipedia Encyclopedia
구글 검색 결과
구글 검색 결과
구글 검색 결과
구글 검색 결과